Part IX - Reading and Interpreting the Histogram - Basic Adjustments
The Develop Module
If you're still reading this series it means that:- You found it interesting, and I'm really happy to hear that this is helping you somehow.
- It's now time to start editing your images.
The Develop module is the module in which most of the post-production editing will be done. The structure of the Develop module window is very easy to understand:
- Most of the editing tools are located in the panels in the right palette.
- The left side palette contains the panels used to manage the presets, the change history and the collections.
The Basics
One big advantage of using a tool such as Lightroom, is that it is a non destructive editing tool. What does this mean and why should it matter to you? Well, this is a very important characteristic that unleashes your creativity without ever worrying about damaging your original files.When you edit an image in a Lightroom catalog, you're really never modifying the original file. Instead, Lightroom is tracking down each and every modification you apply and stores them in the catalog database. The advantages of this approach are manifold:
- You can experiment without restraint. Lightroom is protecting your master files and you won't touch them. Ever.
- You can create as many virtual copies of the master as you need, if you want to apply different settings to the same images.
- Lightroom will keep track of the complete modification history of each image in the catalog. If, at a later time, you want to review it, it's there for you.
- The modification history can be snapshotted at any time. If, for example, you take snapshots of an image at different stages of your work, you will be able to reload a different snapshot at any time in case you want to start over from a previous point of the image history.
Virtual Copies
A virtual copy of an image is another version of the same image to which you can independently apply a set of adjustments of any kind. Although a virtual copy is undistinguishable from a regular image, it's most often used to apply a different set of develop settings to an image.
A virtual copy of an image can be created both in the Library and in the Develop module, selecting the Create Virtual Copy item of the Lightroom Photo menu or of the image contextual menu. In the Library module, a virtual copy is easily identifiable by the "twisted corner" of its thumbnail, as shown in the following picture:
A virtual copy of an image can be created both in the Library and in the Develop module, selecting the Create Virtual Copy item of the Lightroom Photo menu or of the image contextual menu. In the Library module, a virtual copy is easily identifiable by the "twisted corner" of its thumbnail, as shown in the following picture:
 |
| Lightroom - Virtual Copies |
In the previous screenshot, the first thumbnail is a regular image, and the other two are virtual copies of the same image with (slightly) different develop settings and metadata (the first is not rated, the second has a rating of 4 and the third has a rating of 5).
You can create a virtual copy at any time: Lightroom will create a new virtual copy with the same settings as the source image at that point in time. After creating a virtual image, you can take advantage of its modification history, copied from the original file as well, to roll back to a different point in time or to select one of its snapshots (if available). And if you feel like starting over again, you can reset an image state using the Reset item of the Develop Settings submenu.
Virtual copies are an useful tool to maintain different copies of the same image without duplicating the image itself. Let's suppose that you want to maintain three versions of an image: a color one, a black and white one and a duotone one. Just create two virtual copies, apply the settings you desire and you'll be able to maintain the three images as if they were completely unrelated. Under the surface, however, Lightroom will only store one image (the master file you imported in the catalog), and you won't suffer any space consumption overhead.
The history of an image is stored in the History panel, on the left side palette of the Develop module, as shown in the following picture:
In the previous picture, you can see an example of the history of an image. The selected item, a modification of the Tint setting, is not the top of the list but it's the third in time: this means that I'm inspecting the state of the image as it was two modification steps ago. In this case, the new value of the Tint setting is 27 and it's a +20 modification from its previous value.
If I continued to work from this state, and applied a new modification, the following history entries would be deleted and the history would start reflecting the image state since where I am.
This is the kind of situation in which you would consider creating a snapshot.
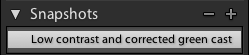
Snapshots can be managed using the Snapshots panel in the Develop module, as shown in the following picture:
In the figure above, you can see that the currently selected picture has got just one snapshot, called Low contrast and corrected green cast.
You can create a virtual copy at any time: Lightroom will create a new virtual copy with the same settings as the source image at that point in time. After creating a virtual image, you can take advantage of its modification history, copied from the original file as well, to roll back to a different point in time or to select one of its snapshots (if available). And if you feel like starting over again, you can reset an image state using the Reset item of the Develop Settings submenu.
Virtual copies are an useful tool to maintain different copies of the same image without duplicating the image itself. Let's suppose that you want to maintain three versions of an image: a color one, a black and white one and a duotone one. Just create two virtual copies, apply the settings you desire and you'll be able to maintain the three images as if they were completely unrelated. Under the surface, however, Lightroom will only store one image (the master file you imported in the catalog), and you won't suffer any space consumption overhead.
History
Almost every program you use every day supports at least a basic form of command history. When you undo an action, for example, you're rolling back one step in the modification history of your file. Lightroom history, however, is different: it's persistent. This means that the history is stored alongside any other image setting and it will survive Lightroom restarts. Thus, you will be able to examine the history and roll it back at any time you wish. If you're an Adobe Photoshop user, you will recognize in Lightroom this well known Photoshop feature.The history of an image is stored in the History panel, on the left side palette of the Develop module, as shown in the following picture:
 |
| Lightroom Develop Module - History Panel |
In the previous picture, you can see an example of the history of an image. The selected item, a modification of the Tint setting, is not the top of the list but it's the third in time: this means that I'm inspecting the state of the image as it was two modification steps ago. In this case, the new value of the Tint setting is 27 and it's a +20 modification from its previous value.
If I continued to work from this state, and applied a new modification, the following history entries would be deleted and the history would start reflecting the image state since where I am.
This is the kind of situation in which you would consider creating a snapshot.
Snapshots
There are times where you where you'd like to be able to freeze an image settings at a point in time. Lightroom will let you do it and this feature is called a snapshot. When you create a snapshot, you're saving the state of the image at the time the snapshot is taken. An image, moreover, can have as many snapshots as you need and, once more, they are a feature that do not introduce any overhead. If you're experimenting different settings, as sure you will, snapshots are the quickest way of pinning those you like them and marking them as candidates for the final image version.Snapshots can be managed using the Snapshots panel in the Develop module, as shown in the following picture:
 |
| Lightroom Develop Module - Snapshots Panel |
In the figure above, you can see that the currently selected picture has got just one snapshot, called Low contrast and corrected green cast.
If you want to help me keep on writing this blog, buy your Adobe Photoshop licenses at the best price on Amazon using the links below.
No comments:
Post a Comment